Hide minor edits - Show changes to markup
ctf_atomicgarden1.jpg | legend.jpg
ctf_barbeque-beta41.jpg | ctf_barbeque-beta42.jpg | legend.jpg
ctf_bedrooms1.jpg | ctf_bedrooms2.jpg | ctf_bedrooms3.jpg | legend.jpg
ctf_bloodbath-b51.jpg | legend.jpg
ctf_citadel1.jpg | ctf_citadel2.jpg | legend.jpg
ctf_contrived1.jpg | ctf_contrived2.jpg | ctf_contrived3.jpg | ctf_contrived4.jpg | legend.jpg
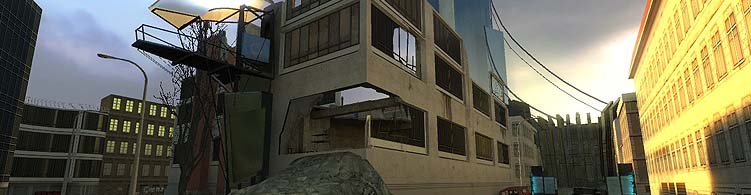
ctf_floodzone1.jpg | legend.jpg
ctf_export1.jpg | ctf_export2.jpg | ctf_export3.jpg | ctf_export4.jpg | legend.jpg
ctf_flagarena1.jpg | legend.jpg
ctf_flagarena2-b1.jpg | legend.jpg
ctf_floodzone1.jpg | legend.jpg
ctf_gunshot1.jpg | ctf_gunshot2.jpg | ctf_gunshot3.jpg | ctf_gunshot4.jpg | legend.jpg
ctf_intervention1.jpg | ctf_intervention2.jpg | ctf_intervention3.jpg | legend.jpg
ctf_joust_b21.jpg | legend.jpg
ctf_pedestal1.jpg | legend.jpg
ctf_pedestal21.jpg | legend.jpg
ctf_pedestal_remix1.jpg | legend.jpg
ctf_pipeline-pro1.jpg | ctf_pipeline-pro2.jpg | legend.jpg
ctf_smallfort1.jpg | legend.jpg
ctf_substation1.jpg | ctf_substation2.jpg | ctf_substation3.jpg | ctf_substation4.jpg | ctf_substation5.jpg | legend.jpg
ctf_substation1.jpg | ctf_substation2.jpg | ctf_substation3.jpg | ctf_substation4.jpg | ctf_substation5.jpg | legend.jpg
ctf_tower_arena1.jpg | ctf_tower_arena2.jpg | ctf_tower_arena3.jpg | legend.jpg
ctf_twofort_lite1.jpg | ctf_twofort_lite2.jpg | legend.jpg
dom_np_refinery1.jpg | dom_np_refinery2.jpg | dom_np_refinery3.jpg | dom_np_refinery4.jpg | dom_np_refinery5.jpg | dom_np_refinery6.jpg | legend.jpg
dom_rebellion1.jpg | dom_rebellion2.jpg | dom_rebellion3.jpg | dom_rebellion4.jpg | legend.jpg
dom_toon-town_b11.jpg | dom_toon-town_b12.jpg | dom_toon-town_b13.jpg | dom_toon-town_b14.jpg | legend.jpg
If you don't know what your autoexec.cfg is, it's time to learn. Take a look at this guide on Counter-Script.net for details on what a cfg is and how you make binds and scripts. While that guide is for CS, the principles remain the same. In short, your cfg is where you put all your binds, optimization settings, scripts, and anything related to the configuration of the way you play HL2CTF. By default, your config will be in Valve\Steam\SteamApps\SourceMods\hl2ctf\cfg. Put any changes you make into a file called 'autoexec.cfg' and HL2CTF will automatically load it each time you play.
If you want an example config you can download and view mine here: cynautoexec.cfg .
If you don't know what your autoexec.cfg is, it's time to learn. In short, your cfg is where you put all your binds, optimization settings, scripts, and anything related to the configuration of the way you play HL2CTF. By default, your config will be in Valve\Steam\SteamApps\SourceMods\hl2ctf\cfg. Put any changes you make into a file called 'autoexec.cfg' and HL2CTF will automatically load it each time you play. Remember that in most servers, scripts will be turned off.
Here's a quick list of all the commands for HL2CTF which go can your config. Take a look at my example config if you want to see exactly how to use them.
Here's a quick list of all the commands for HL2CTF which go can your config.
Railgun: use weapon_ctf_railgun\\
Drop Armour: dropbattery\\
Drop Armor: dropbattery\\
First off, make sure you directly bind weapons to keys rather than using the default slot system (the way it works in HL2 single player). This will allow you to switch weapons faster and easier.
There are a lot of buttons to bind in HL2CTF. With a dozen or so weapons and a pile of secondary commands, you need to have a good setup to make sure you can perform all the actions you need to. For example, I have an 8 button mouse with a wheel and all of them are bound to something. If you don't have as many buttons at your fingertips as I do, you're going to have to take some short cuts. One good one is to bind the OICW and the OICW zoom to the same button. This way you press [KEY] once to draw the OICW, and [KEY] again to toggle the zoom. To do this, add this line to your cfg:
bind "[KEY]" "+alt1;use weapon_ctf_oicw"
Another pair of good binds is to bind the stunstick and crowbar to the same button (since you'll always only have one of them), and also Alyx's pistol and the default pistol to the same button (because in any circumstance where you'd use the pistol, Alyx's pistol is better). The cfg lines for those binds are as follows:
bind "[KEY]" "use weapon_pistol;use weapon_ctf_alyxgun"bind "[KEY]" "use weapon_crowbar;use weapon_stunstick"
Point being, play around with your config and find something that works for you.
As a preface, let me say that I don't care if you think scripts are fair or unfair, good or bad, or useful or useless. I don't care, so save it. I'm presenting them here so you can try them out and use them if you want or not use them if you don't want. It's your call. I've never seen anything you can do with a script that you can't do manually. That said, some scripts make some manuevers a bit easier. Other scripts are poorly written and only screw you up. As a general rule, the more complex a script is the less likely it will actually work.
This is the only script that I definitely think is useful. With it, every time you jump you duck. Hold the key to stay ducked. Here you go:
alias +duckjump "-speed ; +jump ; +crouch"alias -duckjump "-jump ; -crouch"bind "SPACE" "+duckjump" // SPACE can be anything, obviously.
Note that using this script will make it impossible (or very difficult) to use the jump pads next to the beds on ctf_bedrooms. Caveat emptor, I always say.
With this you can use the suit zoom to let you zoom with the magnum. It isn't useful very often, but it's kinda nice on Canals or other big maps. Suit yourself.
bind "[MAG KEY]" "magkeys;use weapon_357"bind "[OTHER WEAPON KEYS]" "regkeys;use weapon_[WHATEVER]"alias magkeys "-attack;-attack2;bind mouse2 +zoom"alias regkeys "-attack;-attack2;bind mouse2 +attack2"
If you're going to use this one, you'll have to change your magnum to be like the first line, and every other weapon to be like the second line. Ie, replace [KEY] with all the keys you have your weapons bound to already, and [WHATEVER] with the appropriate weapon code (see Config Commands above). Otherwise the next time you go to shoot an orb you will do a suit zoom.
To use the script, when you have the mag out, hold right click to zoom. Once you're zoomed, hold left click. When you line up what you want to shoot at, release right click, and you will shoot. Like I said, it's kinda useful, but not very. It sounds better on paper than it is in game because there's a bit of delay on shooting.
This script makes it so that whenever you press and hold a button you get out the grav and start trying to catch whatever's in your crosshairs. When you release the button it puts the grav away and switches back to whatever weapon you were using. Pretty useful, but it's quirky. This is a good script to use if you're trying to learn to cook nades.
alias +grab "use weapon_physcannon; wait; +attack2"alias -grab "-attack2;lastinv"bind [KEY] "+grab"
Only read this if you're planning on making scripts. If not, don't. If you're a scripter, you know that to have a delay between commands, you use the 'wait' command. However, it's important to note two things. 1) All waits are not equal. The length of the wait in actual time depends on the server tick rate, so if you use wait8 in a script and it works on one server, it may not work exactly the same on another, so you may have to adjust. 2) While you're in the middle of a wait, any other commands you type will not execute until after the wait is over. For short waits this isn't a big deal, but it can make your manuevers imprecise and it's all the more reason to keep the number of waits in a script to a minimum.
You can set your prefered model in a autoexec.cfg or in the console using:
cl_rebelmodel <model>cl_combinemodel <model>
Selecting a player model in the Multiplayer Options (cl_playermodel) will only allow you to set your preferred model for a specific team, using the cvars is the best option to get the right model no matter which team you join.
You can use below models on servers with ctf_extramodels enabled (set to 1):
When HL2DM first came out Alba made a set of skins that made the combine blue and the rebels red. They look like this: (alba1.jpg | alba2.jpg | alba3.jpg). These skins work with HL2CTF as well, and can be a big help telling the difference between friend and foe at a distant or at a glance. The game doesn't look as cool with them as without them, because it kind of looks like you're killing teletubbies, but there you have it. Note that some leagues/servers frown on coloured skins, so use at your own risk. To install them, read the instructions that come in the zip. You can download them here from RapidShare.de. Note: if this link doesn't work, try again later. There's an hourly bandwidth cap on it.
I've found the RPG difficult to use for EJing, but try it and you might have better luck than I do. The principles are the same, so just give it a try.
A good map to practice EJing on is ctf_jump, which has lots of high platforms and health to play around with.
Also remember that if you have the damage rune you can EJ twice as far. This is particularly good on canals, because with damage you can get most of the way from flag to flag with only one nade. Of course, you also do twice as much damage to yourself, so be careful.
Download a tutorial demo of me showing some EJing on Pedestal. ejtutorial.dem (Note: to play demos, put the .dem in your hl2ctf directory and type 'demoui' in console to load it up.)
I've found the airburst difficult to use for EJing, but try it and you might have better luck than I do. The principles are the same, so just give it a try.
A good map to practice Rpg EJing on is xxx_blooddish, since its got a double damage rune and you have excessive amounts of rpg missiles you can really get a feel for jumping around. For nade EJing, ctf_floodzone or ctf_canyon2 fits the bill.
Also remember that if you have the damage rune you can EJ twice as far. This is particularly good on blooddish, because with damage you can get most of the way from flag to flag with only one nade. Of course, you also do twice as much damage to yourself, so be careful.
First and most obviously is to hit them on their way in. A clean hit with a magnum, sniper rifle, xbow, shotgun, or any explosive will hurt them enough to force them to suicide. However, because they usually enter and exit fast, you've gotta be playing dedicated defence or else they'll burn right by you. By dedicated defence I mean sitting on top of the flag, waiting for jumpers to show up. Because you can't push by someone in CTF, if you're on top of the flag, the jumper won't be able to steal it. In the meantime, you're ultra close range with a shotgun, so you can blast the hell out of him. Even if he gets the flag, if you take him down to half health, you've stopped him from jumping, and he'll be forced to run it out while injured.
First and most obviously is to hit them on their way in. A clean hit with a magnum, sniper rifle, railgun, xbow, shotgun, or any explosive will hurt them enough to force them to suicide. However, because they usually enter and exit fast, you've gotta be playing dedicated defence or else they'll burn right by you. By dedicated defence I mean sitting on top of the flag, waiting for jumpers to show up. Because you can't push by someone in CTF, if you're on top of the flag, the jumper won't be able to steal it. In the meantime, you're ultra close range with a shotgun, so you can blast the hell out of him. Even if he gets the flag, if you take him down to half health, you've stopped him from jumping, and he'll be forced to run it out while injured.
Walljumping is very ninja, but it's also pretty tough and takes practice. To wall jump, strafe jump into a wall, and then press jump again. Sounds easy, right? Well, it's easy to wall jump, but it's tougher to use it so it does you any good. The best way to use it is to jump over high walls that you wouldn't normally be able to get over, such as the walls in pedestal or dirtwork. If you walljump just right, you can leap onto the top of these walls from the ground in one manuever. Naturally, this means you can skip over portions of the map, attack opponents from directions they aren't expecting you, and generally act like a bad ass.
If you want to practice wall jumping over walls, load up pedestal, dirtwork, or tweak and just start trying. You'll have more success if you start your first jump from the ground a little ways away from the wall rather than from right beside the wall. Also, while you do your wall jump, quickly turn the mouse "into" the wall while you strafe into the wall, I've found this helps gain you some momentum to carry yourself over the wall (although it doesn't gain you any height). In terms of how easy it is to wall jump over the walls, dirtwork is the hardest (because the ground isn't totally flat), pedestal is medium, and tweak is the easiest (the fence in the middle is slightly shorter than the walls on pedestal). Remember, practice practice practice. Don't get discouraged if you can't get it at first.
Walljumping is very ninja, but it's also pretty tough and takes practice. To wall jump, strafe jump into a wall, and then press jump again. Sounds easy, right? Well, it's easy to wall jump, but it's tougher to use it so it does you any good. The best way to use it is to jump over high walls that you wouldn't normally be able to get over, such as the walls in raven or dirtwork. If you walljump just right, you can leap onto the top of these walls from the ground in one manuever. Naturally, this means you can skip over portions of the map, attack opponents from directions they aren't expecting you, and generally act like a bad ass.
If you want to practice wall jumping over walls, load up dirtwork or raven and just start trying. You'll have more success if you start your first jump from the ground a little ways away from the wall rather than from right beside the wall. Also, while you do your wall jump, quickly turn the mouse "into" the wall while you strafe into the wall, I've found this helps gain you some momentum to carry yourself over the wall (although it doesn't gain you any height). In terms of how easy it is to wall jump over the walls, dirtwork is the hardest (because the ground isn't totally flat), raven is medium because of a lot of the thin platforms, and a flat wall with a flat floor is the easiest. Remember, practice practice practice. Don't get discouraged if you can't get it at first.
When using armour or health batteries on the wall, don't just face the wall and stand still like an idiot. You can use the batteries from a little ways away, so move around while you charge up. Even just going back and forth in a 3 foot circle might save your life from a headshot from behind.
When going up against someone with an Xbow or Magnun, use the timing of their weapon against them. Most people when using the xbow will fire a shot as soon as it has been reloaded. If you know how long this takes, you know when to dodge. For example, your opponent has an Xbow and his first shot missed. Run in a straight line for as long as it takes for him to reload, and he'll lead his shot to the end of that line. At the last second, strafe one way or the other. I find this is more effective than doing the random dance the entire time, because you've got better aim when you're not moving frenetically. The same principles apply to the magnum, but the time between shots is much less. Naturally this technique doesn't work very well against someone who's switching weapons constantly, but there you have it.
All Health and Suit chargers are dead in this mod. We do not promote standing still staring at a wall. So, if you wanna stay healthy, keep track of where health kits and the new battery kits are placed on a map. Also, your teammates can give you their health and suit armor if you need some. So work together if you are in trouble.
When going up against someone with an Xbow, Railgun, or Magnun, use the timing of their weapon against them. Most people when using the Xbow or Railgun will fire a shot as soon as it has been reloaded. If you know how long this takes, you know when to dodge. For example, your opponent has an Xbow or Railgun and his first shot missed. Run in a straight line for as long as it takes for him to reload, and he'll lead his shot to the end of that line. At the last second, strafe one way or the other. I find this is more effective than doing the random dance the entire time, because you've got better aim when you're not moving frenetically. The same principles apply to the magnum, but the time between shots is much less. Naturally this technique doesn't work very well against someone who's switching weapons constantly, but there you have it.
At 39 damage for a headshot, fast reload and good accuracy, the pistol is savage. Don't think it sucks just because it's your default weapon (in Pro mode). It's best at mid range, and works OK as a finisher after you've softened somebody up with another gun or a grenade.
At 27 damage for a headshot, fast reload and good accuracy, the pistol isnt bad. Don't think it sucks just because it's one of your default weapons. It's best at mid range, and works OK as a finisher after you've softened somebody up with another gun or a grenade.
Alyx's gun does a bit less damage than the pistol but is considerably more accurate when it's in semi mode, so it's good for tapping off headshots at long range. It also has a larger clip than the pistol, at 25 instead of 18. In full auto mode the spray is less accurate than the default pistol. If you use full auto mode don't shoot more than 5 or 6 bullets in a burst and you'll maintain accuracy more (like in CS).
Alyx's gun does more damage than the pistol and is considerably more accurate when it's in semi mode, so it's good for tapping off headshots at long range. It also has a larger clip than the pistol, at 25 instead of 18. In full auto mode the spray is less accurate than the default pistol. If you use full auto mode don't shoot more than 5 or 6 bullets in a burst and you'll maintain accuracy more (like in CS).
The magnum is God. With 6 shots in a clip that can each do 255 on a headshot and perfect accuracy (the bullet always goes exactly where your crosshair is), the 357 has more potential for destruction than any other gun. Always aim for the head. Best at mid to long range, or in narrow corridors. Takes a long time to reload, but it will behind the scenes reload. If you hit someone once or twice in the body and they don't die, switch to another weapon like a shotgun or machine gun to finish them off.
The magnum is God. With 6 shots in a clip that can each do 225 on a headshot and perfect accuracy (the bullet always goes exactly where your crosshair is), the 357 has more potential for destruction than any other gun. Always aim for the head. Best at mid to long range, or in narrow corridors. Takes a long time to reload, but it will behind the scenes reload. If you hit someone once or twice in the body and they don't die, switch to another weapon like a shotgun or machine gun to finish them off.
Unless you have shells for the secondary fire, the SMG is worthless. It does about half the damage as the pistol and is less accurate. If you do have the shells, you're in good shape though. The lobbing grenades are the highest damage, easiest to use explosives aside from the RPG, so you can really ruin someone's day with it. Make sure to aim just above your target to compensate for the lob. The SMG does not reload behind the scenes.
The smg has been bumped up to 10 from 6 dmg which is a significant bump from the last version of the mod. It does a little more damage then the pistol, but is less accurate. Because of the increase in dmg, we have lowered the clip and size of the clip down so spraying like a wild man may not get you very far. If you have the smg grenades, you're in good shape. The lobbing grenades are the highest damage, easiest to use explosives aside from the RPG, so you can really ruin someone's day with it. Make sure to aim just above your target to compensate for the lob. The SMG does not reload behind the scenes.
The secondary can be tricky to use, but it's a great room clearer. Orbs suck outdoors or in large open spaces, so don't bother. The best way to use them is to fire them into the flag room to clear it out before you assault. Orbs are also key in taking down heavily armoured shield rune carriers. Beware of odd bounces though, because unlike in HL2DM, you can be killed by orbs you fire. Careful of friendly fire as well. You can catch them with your grav gun, and if you're really ninja you can fire one from the pulse, switch to grav, and catch it before it goes anywhere, allowing you to fire it again without having to wait for the charge up.
The secondary can be tricky to use, but it's a great room clearer. Orbs suck outdoors or in large open spaces, so don't bother. The best way to use them is to fire them into the flag room to clear it out before you assault. Orbs are also key in taking down heavily armoured shield rune carriers. Beware of odd bounces though, because unlike in HL2DM, you can be killed by orbs you fire. Careful of friendly fire as well. You can catch them with your grav gun, and if you're really ninja you can fire one from the pulse, switch to grav, and catch it before it goes anywhere (yoyo'ing), allowing you to fire it again without having to wait for the charge up.
Airbursts are about equivalent to the SMG secondary. They're the easiest secondary to use because they go exactly where you point the gun. Fire at your opponent's feet.
Zoom on the OICW is handy for picking off long range headshots, but it's not that useful. You have to bind OICW zoom to its own key. I like binding it to the same key as the OICW itself, so I press X once for OICW, and X again for OICW zoom toggle.
Airbursts are about equivalent to the SMG secondary. They're the easiest secondary to use because they go exactly where you point the gun. Fire at your opponent's feet. They only travel so far though before exploding, so keep that in mind when blasting away.
Zoom on the OICW is handy for picking off long range headshots, but it's not that useful. You have to bind OICW zoom to its own key.
There's a reason most kills are made by the shotgun. It's the ultimate close quarters finishing move weapon. Close range headshots do an obscene amount of damage. It's only good for very short range though, as it spreads out very quickly. Primary fire is better than secondary fire as it is more accurate and doesn't spend ammo as fast. A favourite move of many players (I'm looking in your direction, Ghost) is to hit with the xbow first and finish with a quick blast with the shotgun. New to 1.7 is that the shotgun no longer gets a crosshair except for the quickinfo bars.
There's a reason most kills are made by the shotgun. It's the ultimate close quarters finishing move weapon. Close range headshots do an obscene amount of damage. It's only good for very short range though, as it spreads out very quickly. Primary fire is better than secondary fire as it is more accurate and doesn't spend ammo as fast.
Ah the RPG. Since 1.7 the RPG isn't as abusive because now it does "only" 100 damage, but it's also regained the guiding laser just like in DM. This means that after you fire it, you can guide the missile by pointing it where you want it to go. This means you can fire around corners or behind cover. Remember to always shoot for the feet, and remember that you can't switch weapons until the rocket explodes. Rockets are great to lob around corners when you know someone is following you. Don't forget to lead the shot a little bit. The RPG shouldn't be too hard to figure out. If you're fighting someone who's using the RPG, try and get as up close and personal as fast as possible, or take them out from long range.
Ah the RPG. Since 1.7 the RPG isn't as abusive because now it does "only" 100 damage, but it's also regained the guiding laser just like in DM. This means that after you fire it, you can guide the missile by pointing it where you want it to go. This means you can fire around corners or behind cover. Remember to always shoot for the feet, and remember that you can't switch weapons until the rocket explodes. Rockets are great to lob around corners when you know someone is following you. Don't forget to lead the shot a little bit. The RPG shouldn't be too hard to figure out. If you're fighting someone who's using the RPG, try and get as up close and personal as fast as possible, or take them out from long range. The secondary fire allows you to switch from guiding missiles to unguided. This can be useful if you wanna pump a few rockets in a direction and keep on moving towards another objective.
This is HL2CTF's answer to CS's AWP and Quake's railgun. Huge, frightening, and hitscan. Best used with the scope at long range, but if you're ninja you can use it at close range without the scope. You don't get a crosshair unless you're zoomed, so noscoping is tough but possible. The sniper takes ages to reload, about as long as the magnum, so if you miss your first shot and your enemy is coming after you, switch weapons. If someone is shooting at you with this bad boy, watch for the trail of the spiral shot and you can find out where they are.
This is HL2CTF's answer to CS's AWP. Huge, frightening, and hitscan. Best used with the scope at long range, but if you're ninja you can use it at close range without the scope. You don't get a crosshair unless you're zoomed, so noscoping is tough but possible. The sniper takes ages to reload, about as long as the magnum, so if you miss your first shot and your enemy is coming after you, switch weapons. If someone is shooting at you with this bad boy, watch for the trail of the spiral shot and you can find out where they are.
The Railgun is HL2CTF's answer to Quake's Railgun. Built by the Rebels (like the Xbow), the Railgun isn't the prettiest thing to look at, but its evil in the right hands. It fires rebar bolts like the Xbow, but the speed is almost twice as fast and there is no gravity related drops. It's reload timing will take time to get used to, but its potential damage makes up for it. It is the choice default weapon for Instagib mode.
SLAMs are a good way to slow people down when they're approaching the flag, but they take patience to plant effectively. Try to put them in narrow corridors. Planting them on ladders works well. You can shoot them with anything to blow them up if they're in your way, but don't get too close.
You can also SLAM launch them in a similar way as you would cook a nade, by tossing a remote SLAM, picking it up with your grav gun and throwing it at enemies, and then switching back to SLAM and right clicking to detonate it. Usually the same effect is easier to pull off by cooking nades though.
SLAMs are a good way to slow people down when they're approaching the flag and with 2.0, are easy to plant. Try to put them in narrow corridors. Planting them on ladders works well. You can shoot them with anything to blow them up if they're in your way, but don't get too close. They are now team based so you can plant as many as you can without worrying about teammates getting hurt by them or yourself being injured by them. There is a server cvar that is called ctf_slamsdiewithowner. If this is set to 1 (default), your slams will explode when you die.
You can also SLAM launch them in a similar way as you would cook a nade, by tossing a remote SLAM, picking it up with your grav gun and throwing it at enemies, and then switching back to SLAM and right clicking to detonate it. Usually the same effect is easier to pull off by cooking nades though. I have found that tossing 2 slams on the ground will give you the best explosion jump possible in this game, but it takes a lot of time and is near impossible to pull off with a lot of enemy traffic around.
There are a couple scripts you can use to help you cook nades, but the script can't help you with the hard part - timing the throw.
The grav is awesome. Cook nades, catch orbs, and smash people with toilets. What else do you want? Physics are a great way to kill heavily armoured opponents. Especially the long tables, hotel signs, radiators, sawblades, and most importantly, the explosive barrels. A clean hit with any phys prop will kill anyone. If someone's coming at you with a prop, don't forget that you can catch it. Just get out your grav and right click while looking at the object they're going to throw, and then wing it right back at them. Prop kills work best when you wait around a corner with a big object and crush people as they turn. You can also use props for cover as you advance, but this is dangerous because it obscures your visibility.
If someone is coming at you with a prop, get out your ggun and hold right click while looking at the prop they're holding. As soon as they launch it, you'll catch it, and you can often launch it right back at them for a quick kill. You don't have to right click while the object is in the air.
One other important uses of the grav is to pull items towards you. On many maps there are items that are in precarious or inconvenient positions. Pull them to yourself with the grav to save time. A good habit to get into is to use the grav to collect items while you're jumping through the area. Every second you save by grabbing items instead of collecting manually is a second you can spend capping or fragging.
The Gravity Gun is awesome. Cook nades, catch orbs, and smash people with toilets. What else do you want? Physics are a great way to kill heavily armoured opponents. Especially the long tables, hotel signs, radiators, sawblades, and most importantly, the explosive barrels. A clean hit with any phys prop will kill anyone. If someone's coming at you with a prop, don't forget that you can catch it. Just get out your Gravity Gun and right click while looking at the object they're going to throw, and then wing it right back at them. Prop kills work best when you wait around a corner with a big object and crush people as they turn. You can also use props for cover as you advance, but this is dangerous because it obscures your visibility.
If someone is coming at you with a prop, get out your Gravity Gun and hold right click while looking at the prop they're holding. As soon as they launch it, you'll catch it, and you can often launch it right back at them for a quick kill. You don't have to right click while the object is in the air.
One other important uses of the Gravity Gun is to pull items towards you. On many maps there are items that are in precarious or inconvenient positions. Pull them to yourself with the Gravity Gun to save time. A good habit to get into is to use the grav to collect items while you're jumping through the area. Every second you save by grabbing items instead of collecting manually is a second you can spend capping or fragging.
Probably the most important aspect of the Gravity Gun is that it gives you the ability to toss the flag. This is a key element in HL2CTF's gameplay and is unique to only this game. There is nothing better then seeing a team execute a flag capture by tossing the flag to each other across a map. It can render a midfield defense completely worthless if done correctly.
Runes are the bane of those that don't have them. So get them. HL2CTF is as much about capturing the flag as it is about capturing the runes and keeping them from your enemies. The most powerful rune is double damage, followed closely by shield, then cloak and drain, then regen, and finally lung. At the start of a match you should run for the spawn points of these runes and grab up as many as you can for you and your teammates. You can wear one and carry another with the grav. If you don't know where they spawn, find out using the maps in this guide. Also, usually the floor where the rune spawns is marked by the symbol of the rune.
This rune increases your damage. In the hands of a good player, they become great. In the hands of a great player, they become unstoppable. All the weapons are good when their damage is doubled, but my personal favourites to use are the magnum, pistol, and shotgun. If you have Damage, keep your health up as much as possible, and don't be afraid to retreat if you're under heavy fire. When you have Damage you are more important than your teammates, because if you die, the enemy will get your rune. Stay in your team's zone of the map and act as a midfielder if you're on your own, and don't assault the flag unless you're working as a team. You're the ultimate point man and battering ram, but you're also a valuable prize to be captured, so be careful.
If you're facing someone with Damage, use high damage weapons, like magnum, xbow, explosives, phys props and orbs. Try and come from a couple angles at once and catch them by surprise. In a pitched battle against an opponent with Damage, unless you kill them right away, you will lose.
Runes are the bane of those that don't have them. So get them. With the newest version (2.0), runes have become team based, making the game a little more class based. The most powerful rune is Double Damage, followed closely by Shield, then Cloak and Drain, then Burst and Regen, and finally Lung. At the start of a match you should run for the spawn points of these runes and grab up as many as you can for you and your teammates. You can wear one and carry another with the grav. The floor where the rune spawns is usually marked by the symbol of the rune.
This rune doubles your damage given and received. In the hands of a good player, they become great. In the hands of a great player, they become almost unstoppable. All the weapons are good when their damage is doubled, but my personal favourites to use are the magnum, OICW, and shotgun. If you have Damage, keep your health up as much as possible, and don't be afraid to retreat if you're under heavy fire. You will die quickly when shot because all damage done unto you is also doubled so beware. You're the ultimate point man and battering ram, but you're also an easy kill, so be careful.
If you're facing someone with Damage, give them all you've got. They will die much faster since they have the Double Damage rune on. From a distance, try to use high damage weapons, like magnum, xbow, explosives, and orbs. In a pinched battle against an opponent with a Double Damage rune, they person who is more accurate will win the battle.
With shield you become a tank. A portion of all the damage you take will be absorbed by the rune, effectively making your health ~35% higher. The flag carrier should have shield if possible. Shield is a good rune for a defender to have, since most flags have chargers nearby. Keep your health up as much as possible, because the power of your rune is proportional to how much health you have. If you're in a group, the shield should go first in line. That way if you die, hopefully your teammate will pick up the rune before an enemy does. I can't tell you how many times I've killed a dude with shield only to have his buddy pick it up right after.
If you're fighting shield orbs and phys props are the way to go. You need to do a lot of damage to take down a shield guy, but orbs and props kill anyone in one shot.
With the Shield Rune you become a tank. A portion of all the damage you take will be absorbed by the rune, effectively making your health ~35% higher. With reward, comes sacrifice as the shield also takes 25% of your speed away, effectively making your sprint only 5 points faster then walking. The shield is the ultimate defensive rune. Keep your health up as much as possible, because the power of your rune is proportional to how much health you have. If you're in a group, the Shield should go first in line. That way if you die, hopefully your teammate will pick up the rune before an enemy does. I can't tell you how many times I've killed a dude with a Shield Rune only to have his buddy pick it up right after.
If you're fighting against someone with a Shield Rune, orbs or props are the way to go. You need to do a lot of damage to take down a Shield guy, but orbs and props kill anyone in one shot.
Cloak is awesome. You become the predator. While you're moving you can be seen, but when you're still you're invisible (except for certain weapons that have lights, like the xbow, RPG, and sniper rifle (while zoomed)). As a cloaker you don't want to ever steal the flag, but you're the ultimate midfielder or escort. Try and use 1 shot kill weapons and take people out before they see you. If you can't take someone out right away, hide. As soon as you become still you turn invisible, so if you can get a corner between you and your pursuer you can stop and wait for them to come around, then get them from behind. However, remember that your name will still pop up when someone moves their mouse over you, so it's important to hide in places they're less likely to look at.
If you're fighting someone with cloak, keep them moving. Keep the pressure on and keep them in sight. Use explosives, orbs, and the shotgun for best results. Also watch for the sniper rifle laser and other weapon lights.
Cloak is awesome. You become the predator. While you're moving you can be seen, but when you're still you're invisible. The only time you are truly seen when you have a Cloak Rune on is when you are firing a weapon. It's the Cloak's clutch. As a cloaker you don't want to ever steal the flag, but you're the ultimate midfielder or escort. Try and use 1 shot kill weapons and take people out before they see you. If you can't take someone out right away, hide. As soon as you become still you turn invisible, so if you can get a corner between you and your pursuer you can stop and wait for them to come around, then get them from behind. However, remember that your name will still pop up when someone moves their mouse over you, so it's important to hide in places they're less likely to look at.
If you're fighting someone with a Cloak Rune, keep them moving. Keep the pressure on and keep them in sight. Use explosives, orbs, and the shotgun for best results. Also watch for the sniper rifle laser and other weapon lights and try taking them out while they are spraying away.
Regen is good but not great. It will heal you 6 health every second. It won't help you out in a firefight, but it's great to help you stay alive on maps with not much health (like greatwall). It's also good to give regen to the flag carrier on domination maps. If you have regen, try to engage from a distance or kill people fast enough that they can't keep the pressure on. If you're fighting someone with regen, keep the pressure on and kill them fast or otherwise they'll whittle you down.
The Regen Rune is good, but not great. It will heal you 6 health every second. It won't help you out in a firefight, but it's great to help you stay alive on maps with not much health (like greatwall). It's also good to give the Regen Rune to the flag carrier on domination maps. If you have Regen, try to engage from a distance or kill people fast enough that they can't keep the pressure on. If you're fighting someone with Regen, keep the pressure on and kill them fast or otherwise they'll whittle you down.
Drain is good fun. It isn't as powerful as Damage, but in the right hands it's deadly. Every time you do damage to someone you gain a portion of the damage you do (~25%) in health and armour, to a maximum of 100H/150A. If you have drain, try and do one shot high damage attacks. Also remember that you gain health from killing people with orbs and phys props, so don't shy away from those just because you have drain.
Drain is a great rune to have if you're stirring up trouble in the midfield or enemy base but not going for the flag. By dealing damage you're not only hurting your opponents but you're also healing yourself. Because you're spending less time recharging and more time fragging, you're even more of a thorn in your opponents side.
There aren't really any special tactics to deal with an opponent with drain, just kill them like you would any highly armoured opponent.
The Drain Rune is good fun. It isn't as powerful as Double Damage, but in the right hands it's deadly. Every time you do damage to someone you gain a portion of the damage you do (~25%) in health and armor, to a maximum of 100H/150A. If you have drain, try and do one shot high damage attacks. Also remember that you gain health from killing people with orbs and phys props, so don't shy away from those just because you have a Drain Rune on.
Drain is a great rune to have if you're stirring up trouble in the midfield or enemy base but not going for the flag. By dealing damage you're not only hurting your opponents, but you're also healing yourself. Because you're spending less time grabbing health and armor kits and more time fragging, you're even more of a thorn in your opponent's side.
There aren't really any special tactics to deal with an opponent with drain, just kill them like you would any highly armored opponent.
The Burst Rune is a flag runner's wet dream. Having it on gives a you a 15% increase in speed and keeps your auxiliary bar high , which can really make a difference on the right player. It really is only useful for flag runners or flag chasers because it doesn't give a player any other tactical advantage. With its auxiliary speed increase it can help new players managing their aux bar while bunny hopping, but someone that has learned the bhop will find little use in this.
Lung lets you swim underwater indefinitely without taking damage. Almost entirely useless seeing as you can swim for so long without taking damage anyway. The only time I've ever used lung effectively is on twofort_lite by camping the underwater RPG with an xbow and killing people as they came after it.
The Lung Rune lets you swim underwater indefinitely without taking damage. Almost entirely useless seeing as you can swim for so long without taking damage anyway. The only time I've ever used lung effectively is on ctf_twofort_lite by camping the underwater RPG with an xbow and killing people as they came after it. It is also the only way to effectively cross the yard water tunnel in ctf_elite.
Written by Cyn, revised by the HL2CTF.org community
I've been playing HL2DM and HL2CTF for about a year now, and in that time I've learned a lot from a lot of different sites and people. Even now, every so often I have a moment of epiphany when I learn something new and go, "Ohhhh, that's how you open the doors on rust." or "So that's where the cloak rune is on canals." The purpose of this guide is to take all these revelations and put them in one place. This guide contains a massive amount of information, some of which may be obvious to you and some of which may not. At any rate, this guide is divided into five basic parts - general strategy, weapons, runes, map strategy, and game customization. An appendix has been included covering some tangential topics - demos, movie making, and map making.
Written by HL2CTF community
This guide contains a massive amount of information, some of which may be obvious to you and some of which may not. At any rate, this guide is divided into five basic parts - general strategy, weapons, runes, map strategy, and game customization. An appendix has been included covering some tangential topics - demos, movie making, and map making.
I can't guarantee this guide is 100% accurate. In fact, I know there are some things that are missing and some things are probably wrong. If you have something you want to add or correct, email it to me at sargasmic at hotmail dot com and I'll put it in. At the time of this writing, this guide is missing map diagrams and tips for the new versions of dom_export, dom_raven, ctf_storm, ctf_contrived, and several custom maps (notably, ctf_tower_arena, ctf_mariobeta, ctf_wizard, and ctf_geryophobia [or however it's spelled]). If anyone wants to make those up, I'd be obliged. I may get around to writing them myself, but who knows when.
I can't guarantee this guide is 100% accurate. In fact, I know there are some things that are missing and some things are probably wrong. If you have something you want to add or correct, email it to me at sacrifist at cgc-online dot com and I'll put it in.
HL2CTF isn't a very big community. If you're playing the game for any length of time you're going to see the same people over and over again. So treat them well. Regardless of any differences you have with another player, remember that everyone has something in common - we all play HL2CTF. Just play the game.
If you're playing the game for any length of time you're going to see the same people over and over again. So treat them well. Regardless of any differences you have with another player, remember that everyone has something in common - we all play HL2CTF. Just play the game.
Team coordination is a term I will throw out a lot in this guide. This is because HL2CTF is a team based mod. Individual talent and killing ability is laudable, but no individual can beat an organized team. So how do you organize and co-ordinate a team? Work in groups. Don't fly solo. If you kill a guy with a rune and you've already got one, carry the rune back to one of your teammates. Escort the flag carrier. Attack the flag from multiple points at once. Communicate using the radio and keep your team informed on where you are. Pay attention to when either team steals the flag.
Team coordination is a term I will throw out a lot in this guide. This is because HL2CTF is a team based mod. Individual talent and killing ability is laudable, but no individual can beat an organized team. So how do you organize and co-ordinate a team? Work in groups. Don't fly solo. If you see a team rune and you've already got one, carry the rune back to one of your teammates. Escort the flag carrier. Attack the flag from multiple points at once. Communicate using the radio and keep your team informed on where you are. Pay attention to when either team steals the flag.
TeamSpeak is a free 3rd party program designed for multiplayer gaming. If you have a microphone, you can sign onto a TeamSpeak server and then use voice chat with your teammates. You can do the same thing within HL2CTF, but the sound quality of TeamSpeak is better and there are a few more options that can be played with. TeamSpeak is a must for scrimming, clan games, or any serious competition because you don't have to type or use the radio to keep your team informed of what's going on. Most clans have their own TeamSpeak server. Download TeamSpeak here.
If you have a microphone, you can sign onto Valve Chat, TeamSpeak, Skype or Ventrilo and then use voice chat with your teammates. You can do the same thing within HL2CTF, but the sound quality of 3rd party programs is better and there are a few more options that can be played with. Team communication with mics is a must for scrimming, clan games, or any serious competition because you don't have to type or use the radio to keep your team informed of what's going on. Most clans have their own Voice Communication server.
As for throwing the flag in general, make sure you aren't throwing it right at an enemy. Also make sure no one is in front of you when you move flag to grav gun, because when it's off your back it is fair game to be returned if it's touched by an enemy. In general, after you throw the flag, don't chase after it. After you've thrown your turn as a carrier is over. Now, turn around and fight the people who are trying to return the flag. Often you can get in some cheap shots because the enemy will be focused on getting the flag back, not necessarily on killing you.
As for throwing the flag in general, make sure you aren't throwing it right at an enemy. Also make sure no one is in front of you when you move flag to grav gun, because when it's out of your hand it is fair game to be returned if it's touched by an enemy. In general, after you throw the flag, don't chase after it. After you've thrown, your turn as a carrier is over. Now, turn around and fight the people who are trying to return the flag. Often you can get in some cheap shots because the enemy will be focused on getting the flag back, not necessarily on killing you.
Midfield are escorts and patrollers. They hold important locations, provide cover, and soften the enemy up. They are the ones that catch thrown flags and help throw them home. Midfielders shouldn't be running right into the enemy base. They should be trolling for people in the neutral zone and keeping teammates informed as to where attacks are coming from and where the enemy carrier is going. They are intercepters. Cloak, drain and regen are the midfielders friend.
Midfield are escorts and patrollers. They hold important locations, provide cover, and soften the enemy up. They are the ones that catch thrown flags and help throw them home. Midfielders shouldn't be running right into the enemy base. They should be trolling for people in the neutral zone and keeping teammates informed as to where attacks are coming from and where the enemy carrier is going. They are intercepters. Cloak, Drain and Regen runes are the midfielders friend.
Offense is the battering ram. These people are the fastest people on the team that can get in, grab the flag and either throw it or run it out. They need the biggest guns and all the health they can get. As soon as they steal, midfielders should be ready to provide cover and prevent the enemy from giving chase. Offense players should have the double damage, shield, or drain.
Offense is the battering ram. These people are the fastest people on the team that can get in, grab the flag and either throw it or run it out. They need the biggest guns and all the health they can get. As soon as they steal, midfielders should be ready to provide cover and prevent the enemy from giving chase. Offense players should have the Burst or Double Damage rune if possible.
Fighting turrets is frustrating. The best way to deal with them is to approach them from cover or from behind and then toss them with the ggun. Never approach them straight on, you'll get cut apart. Explosives and the grav are your best friends. Nades in particular are good because you can bounce them off walls and knock over turrets without getting in their line of sight. If you grab a turret with the grav, make sure it's facing away from you, or it will continue to shoot you point blank. The most permanent way to deal with turrets is to steal them from your enemies base and throw them into inaccessible places, or take them back to your base. A good example of an inaccessible place is on substation in the flag areas in the tunnel behind the trains. The forcefield prevents people from going in and fetching them back out. Another decent one is on defrost, tossing turrets up on top of the white tank in the middle (near the sniper).
Fighting turrets is frustrating. The best way to deal with them is to approach them from cover or from behind and then toss them with the ggun. Never approach them straight on, you'll get cut apart. Explosives and the grav are your best friends. Nades in particular are good because you can bounce them off walls and knock over turrets without getting in their line of sight. If you grab a turret with the grav, make sure it's facing away from you, or it will continue to shoot you point blank. The most permanent way to deal with turrets is to steal them from your enemies base and throw them into inaccessible places, or take them back to your base.
As for placing them, don't place them side by side, but spread them out. Try to put them on opposite sides of the room so that they can cover each other. Make sure they can't be grabbed from behind easily, and that they aren't right next to doorways. Corners of rooms are good, as are up against walls. To get them right up against a wall or in a corner you have to drop them from your ggun and then push them in place by walking into them. Stacking phys props in front of them helps a little bit, but isn't usually worth the time. If you can, put them behind chain link fences, because the fence will block ggun use and most explosives. A specific example of where turrets are good behind fences is on substation on the bottom floor near the red doors that can be opened. There are two fences that flank the doorway, and turrets behind those can cut up anyone who comes that way. The small fenced in area near the front entrace of the bases on prisonriot works well for this as well.
As for placing them, don't place them side by side, but spread them out. Try to put them on opposite sides of the room so that they can cover each other. Make sure they can't be grabbed from behind easily, and that they aren't right next to doorways. Corners of rooms are good, as are up against walls. To get them right up against a wall or in a corner you have to drop them from your ggun and then push them in place by walking into them. Stacking phys props in front of them helps a little bit, but isn't usually worth the time. If you can, put them behind chain link fences, because the fence will block ggun use and most explosives. A specific example of where turrets are good behind fences is on substation on the bottom floor near the first flag area for both teams. There are two fences that flank the doorway, and turrets behind those can cut up anyone who comes that way.
Strafejumping is even more important now that 1.7 is out. It's much easier to go very very fast in 1.7 than it was in 1.6 by bunnyhopping. Friction was decreased, so you have a wider window to hit your next jump in, and thus keep your speed up and keep accelerating. This makes mastering the bunnyhop technique even more important than it was in 1.6 because the advantage you gain is even greater. If you're moving faster you're going to be able to get more guns sooner, more health, runes, and be able to assault the flag faster, all while being harder to hit than if you're stuck on the ground. Only suckers run around, so start jumping.
I'm not going to go into depth on how to strafejump because this guide at Fido's Revenge explains it well. In round terms, it's just like how you gain speed while jumping in Quake, except you can't go as obscenely fast in HL2CTF as in Quake. The exact order of actions is: sprint+strafe - turn the mouse the direction you're strafing - jump. You can duck while you're in the air to make yourself harder to hit (this is what makes players bob up and down in the air), but this isn't necessary for speed. Download a tutorial demo of me showing some bunnyhopping and strafejumping on Pedestal: bhoptutorial.dem. (Note: to play demos, put the .dem in your hl2ctf directory and type 'demoui' in console to load it up.)
Strafejumping is very important in this mod. It's much easier to go very very fast from bunnyhopping which started in 1.7. Friction was decreased, so you have a wider window to hit your next jump in, and thus keep your speed up and keep accelerating. This makes mastering the bunnyhop technique even more important than it was in earlier versions because the advantage you gain is even greater. If you're moving faster you're going to be able to get more guns sooner, more health, runes, and be able to assault the flag faster, all while being harder to hit than if you're stuck on the ground. Only suckers run around, so start jumping.
In round terms, it's just like how you gain speed while jumping in Quake, except you can't go as obscenely fast in HL2CTF as in Quake. The exact order of actions is: sprint+strafe - turn the mouse the direction you're strafing - jump. You can duck while you're in the air to make yourself harder to hit (this is what makes players bob up and down in the air), but this isn't necessary for speed.
Bunnyhopping takes a while to master, but it pays off big time. To practice it, load up an open flat map like pedestal, 2castle, or tweak, and then go to town. On a good day I can hit over 700 UPS in 1.7, compared to 525-550UPS in 1.6.
Bunnyhopping takes a while to master, but it pays off big time. To practice it, load up an open flat map like ig_duality, ctf_floodzone, or cp_canals, and then go to town. On a good day I can hit over 700 UPS in 2.0, compared to 525-550UPS in 1.6.
Download a tutorial demo of me showing some strafejumping and bunnyhopping on Pedestal. bhoptutorial.dem. (Note: to play demos, put the .dem in your hl2ctf directory and type 'demoui' in console to load it up.)
If you lay a flat prop on the ground and then sprint onto it, jump and hit it with the grav gun at the same time as you jump, you can launch yourself up into the air. Most of the time this is just something fun to do, but sometimes it serves a purpose. Using this technique you can get on top of several rooftops that are normally inaccessible, such as the buildings in Canals. Another handy jump is to use a sawblade to bounce onto the sniper rifle building on Dirtwork. Grav jumping is an unreliable technique at best, but it exists. For better results, lay the prop on a short ledge to make it into more of a lever or catapult.
If you lay a flat prop on the ground and then sprint onto it, jump and hit it with the grav gun at the same time as you jump, you can launch yourself up into the air. Most of the time this is just something fun to do, but sometimes it serves a purpose. Using this technique you can get on top of several rooftops that are normally inaccessible. Another handy jump is to use a sawblade to bounce onto the sniper rifle building on Dirtwork. Grav jumping is an unreliable technique at best, but it exists. For better results, lay the prop on a short ledge to make it into more of a lever or catapult.
One thing 1.7 changed was that now your own explosives only do half damage to you, and they push you way further. This makes things like rocketjumping in Quake or concjumping in TFC possible in HL2CTF. Naturally, using this technique effectively can be difficult because it does a lot of damage to you. On the other hand, you can move stupidly fast and skip over all kinds of obstacles. Think of explosion jumping as the new Tau or gauss gun, like in HL1DM.
Your own explosives only do half damage to you, and they push you way further. This makes things like rocketjumping in Quake or concjumping in TFC possible in HL2CTF. Naturally, using this technique effectively can be difficult because it does a lot of damage to you. On the other hand, you can move stupidly fast and skip over all kinds of obstacles. Think of explosion jumping as the new Tau or gauss gun, like in HL1DM.
The easiest way to EJ is with the SMG shells or the OICW airbursts. To do it, look down at the ground directly beneath you. Now, jump and shoot the floor with your explosion at the same time. This should launch you straight up 2-3 stories, and will probably do 40-70 damage to you. If instead of looking straight down you look down and slightly to one side or the other, you'll shoot yourself up and to the side, which can be useful for launching yourself onto balconies or high platforms. For example, you can easily get yourself up onto the balcony from the bridge on twofortlite by EJing like this. Unfortunately, shells and bursts don't have the oomph that SLAMs and grenades do, so you'll be limited in how high you can EJ, although you'll do less damage to yourself.
The easiest way to EJ is with the RPG. To do it, look down at the ground directly beneath you. Now, jump and shoot the floor with your explosion at the same time. This should launch you straight up 2-3 stories, and will probably do 40-70 damage to you. If instead of looking straight down you look down and slightly to one side or the other, you'll shoot yourself up and to the side, which can be useful for launching yourself onto balconies or high platforms. For example, you can easily get yourself up onto the balcony from the bridge on 2fort by EJing like this. Take note that doing this with a Double Damage rune on will double the damage effect, so you will need armor to make a jump with a DD rune. The cool thing with a DD rune on is that you also will go twice as high.
